How to Create an OLAP cube
OLAP cubes collect data for further display on analytic views.
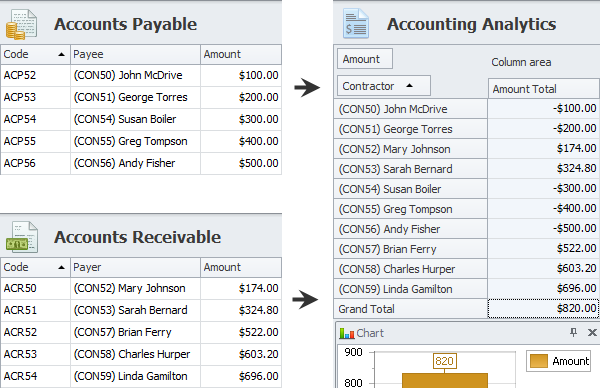
For example, you can monitor financial balance of your company with help of OLAP Cube that extracts data from entity views “Accounts Payable” and “Accounts Receivable”, transforms data by entering “Accounts Payable” amounts as negative values, and loads data into analytic view “Accounting Analytics”.
I. OLAP Cube
II. OLAP Cube Fields
II. ETL Rules
IV. ETL Rule Fields
I. OLAP Cube
To create a custom OLAP cube
1. Log on to the database in Configurator,
2. Right-click OLAP Cubes, and then click Add OLAP Cube.
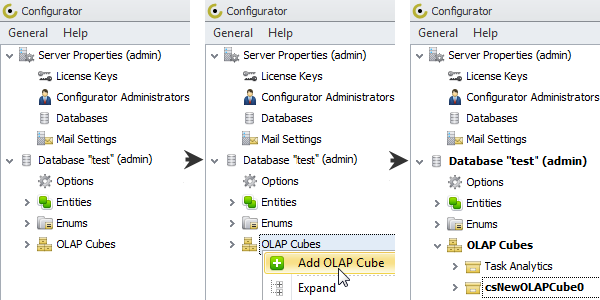
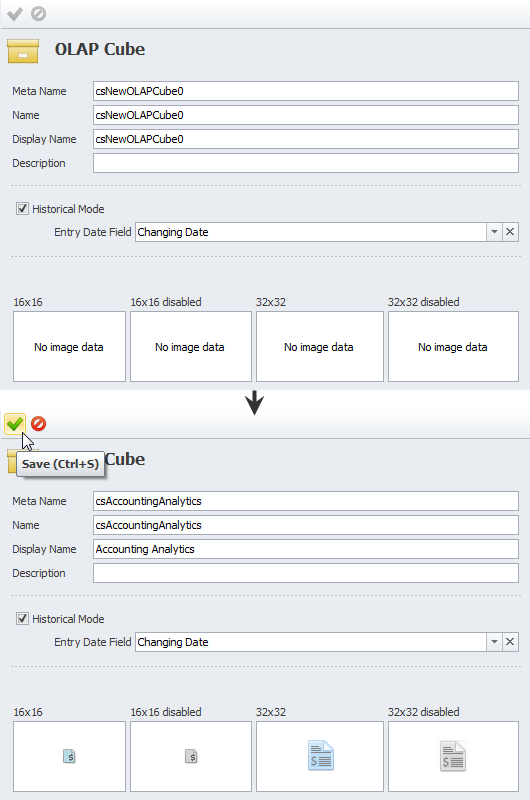
4. Enter OLAP cube settings, and then click Save.
II. OLAP Cube Fields
To create an OLAP cube field
1. Click the right-pointing arrow next to the newly created OLAP cube, right-click OLAP Cube Fields, and then click Add OLAP Cube Field.
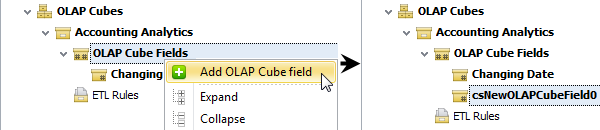
Note The Changing Date field is created automatically, if the Historical Mode option is checked.
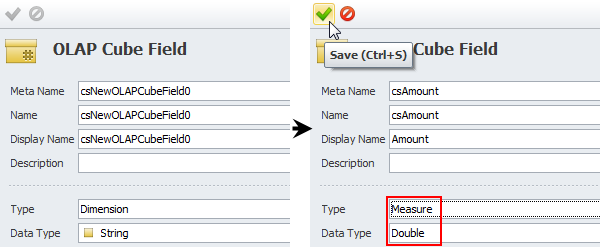
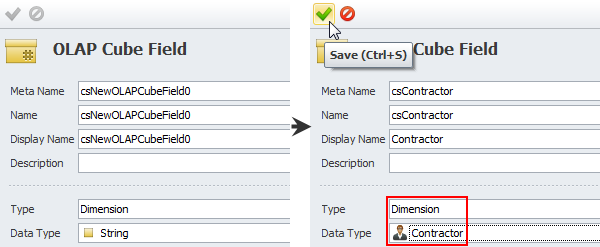
2. Enter OLAP cube field settings, and then click Save.
- To create OLAP Cube Field which data should be measured, you need to select the Measure type and appropriate data type.
- To create OLAP Cube Field by which the measured data will be sorted, grouped or filtered, you need to select the Dimension type and appropriate data type.
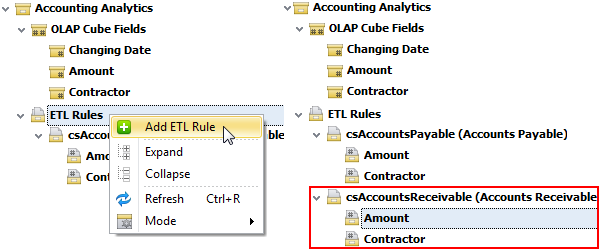
III. ETL Rules
1. Right-click ETL Rules, and then click Add ETL Rule.
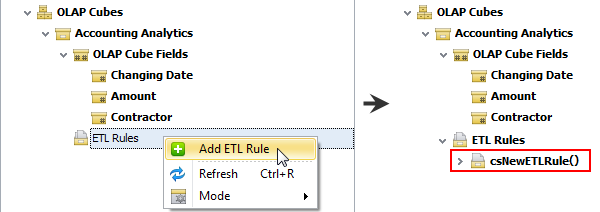
2. Enter ETL rule settings, and then click Save.
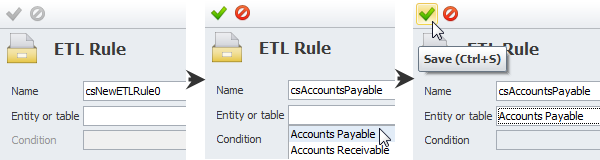
Note The Condition property is used when there are alternative ETL Rules, for example, under Condition A, OLAP Cube follows ETL Rule 1, while under Condition B, OLAP Cube follows ETL Rule 2.
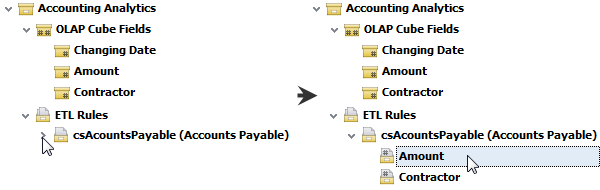
IV. ETL Rule Fields
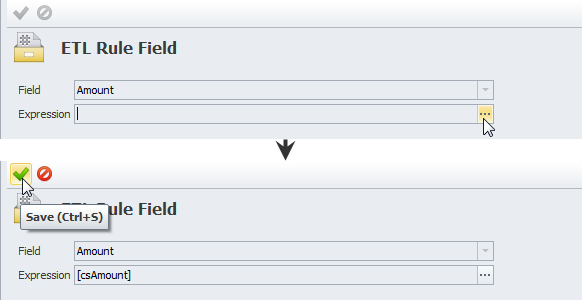
1. Click the right-pointing arrow next to required ETL rule, and then click required ETL rule field.
2. Click Ellipses in the Expression box, and then in the Expression Editor dialog box, enter expression, and click Save.
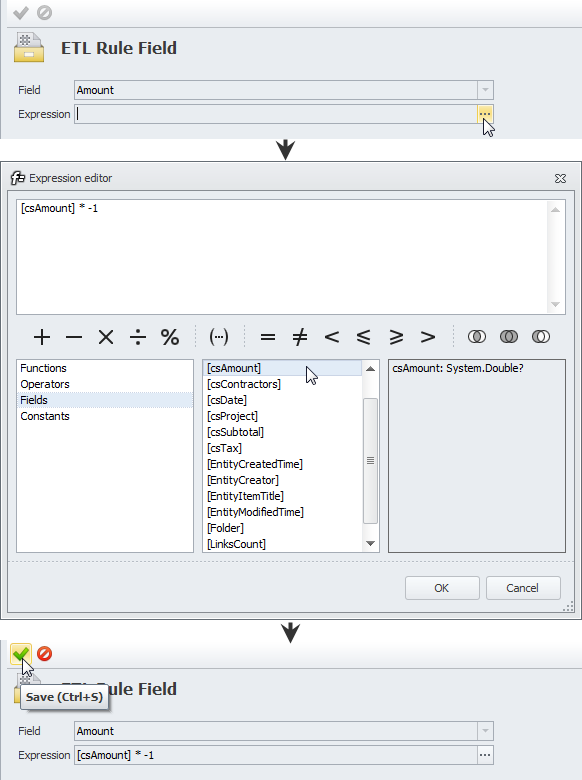
Tip In this example the amount of “Accounts Payable” should get negative, so you should add “* - 1” to the field “csAmount”.
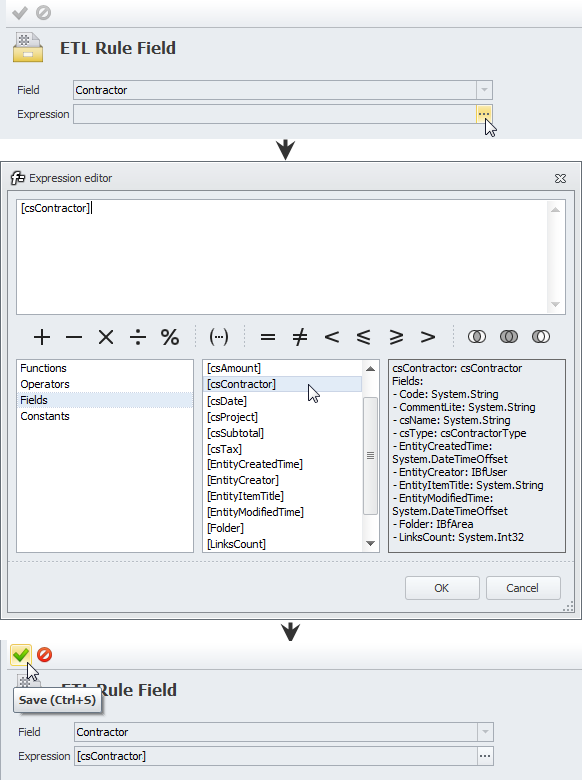
3. Click another ETL Rule Fields, and then enter its settings.
4. Add other ETL Rules with fields and expressions.
Tip In this example the amount of “Accounts Receivable” should remain positive, so the expression consists of the field “csAmount” only.
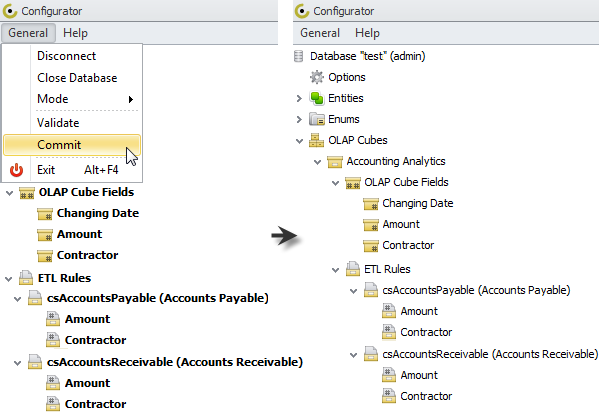
Note When you finish creating OLAP cube, click the General menu, and then click Commit.