How to Create a custom entity
To create a custom entity
1. Log on to the database in Configurator.
2. Right-click the database, point to Mode, and click Entity Configuration.
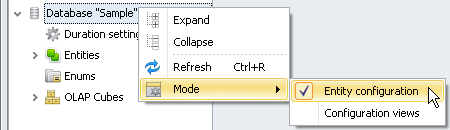
3. Right-click Entities and click Add Entity.

4. Enter Entity Settings.
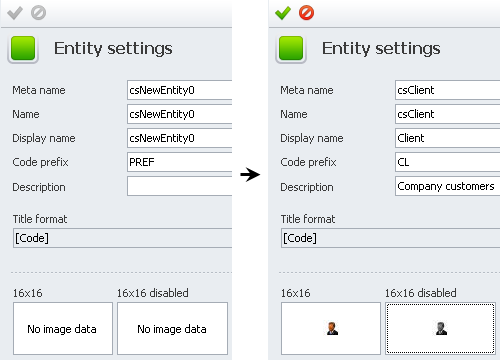
Meta name and Name are saved as one word (without spaces) with prefix cs and can not be modified once the changes have been saved, while Display name which is shown in the user interface, can contain spaces and can be modified.
Tip If Meta name, Name, and Display name are the same, you can enter the name to the Meta name box only and this name will automatically appear in the Name and Display name boxes.

Code prefix is added to the code number of each entity record.
Tip If there are two or more entities which names start with the same letter, you can define two or more letters for Code prefix to avoid duplication of code prefix for different entities. For example, you can define code prefix CL for entity Client, CO for entity Contact, CA for entity Case, etc.

Title format value is calculated by formula. For example, it can be a combination of the entity properties Code and Name.
Tip You can leave Title as is and modify it later when you create entity properties.

Entity icons can help you make CentriQS interface more intuitive.
Tip You can find many free icons in the Internet.
![]()
5. Click Save, then click the General menu and click Commit.
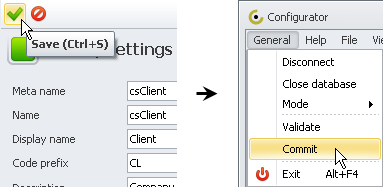
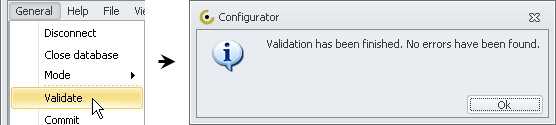
Tip Before clicking Commit, you can click Validate to make sure the changes are correct.
Related articles:
How to create a custom property
How to choose custom property's data type